CleverCleaner has been added to AlternativeTo.net a website for sharing alternatives to software you already know but also a place where you can show your appreciation about tools you already use by marking it as “I like”. Check it out.
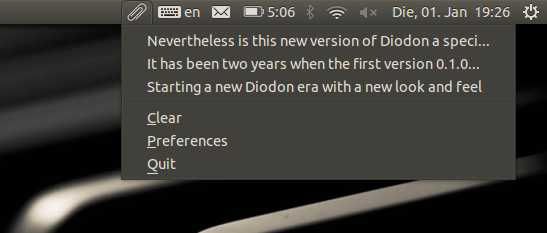
Starting a new Diodon era with a new look and feel
It has been two years when the first version 0.1.0 of Diodon has been released. A lot of work has been done since when it comes to features but mainly to integration into the desktop. This new release is just one of those little steps to make Diodon better integrated and even more useful (see issues solved). And there are still many ideas to be implemented in the future.
Nevertheless is this new version of Diodon a special milestone and therefore I want to give it the version 1.0.0. This is mainly to its long overdue new icons set which gives it’s unique look and feel. razvi of iloveubuntu.net has summarized the significance of this change in this blog post which I want to quote here:
Usually, app icons play an important role on establishing the identity of applications, visual items that contain essential aspects of applications and/or shapes, colors, patterns, etc, designed with an easy-app-identification process in mind. […] Diodon has just been enriched with new icons, refreshing its identity and properly expressing itself via simplistic yet interesting monochrome icons, as well as adopting colored icons.
As a celebration of this new milestone I think it is also time to start promoting Diodon even more. I therefore put a list together with possibilities for you to help out. And I am sure you will have plenty of more ideas.
- Post about Diodon on your blog
- You use another distribution then Ubuntu? Create packages for this distribution (I promise that I will soon look into making a package for the official Ubuntu repository).
- Add Diodon to your software stack on Ohloh.net by using the I Use This! button.
- Mark Diodon as “Like” on AlternativeTo and add alternatives
- Now, there is also a Diodon user group on launchpad. Join in to show your appreciation to Diodon and also optionally take part in the mailing list conversations.
- Or simply follow Diodon on Freecode
- …
I am looking forward to see Diodon getting more adapted in 2013. I herewith also wanted to take the opportunity to thanks the Diodon user community for all the valuable feedback I have received and for you loyalty ;). Thanks… and have a happy new year 2013…
Diodon now with a zeitgeist
Diodon version 0.9.0 has been released today which is basically a maintenance release so it runs smoothly on Ubuntu 12.10. However, behind the scenes a few more things have changed.
For instance is there now a unit testing framework in place which I wrote about in a previous post.
What I want to introduce you in this post though is a start into a new Diodon era using Zeitgeist. You might ask yourself: What is Zeitgeist?
That’s a good question and I think best answered by the Zeitgeist folks themselves. So here is a quote from there website:
Zeitgeist is a service which logs the users’ activities and events, anywhere from files opened to websites visited and conversations had.
It makes this information readily available for other applications to use. It is able to establish relationships between items based on similarity and usage patterns.
As Diodon is basically keeping a history of the last users’ copy events it makes perfect sense to store those events in Zeitgeist. Therefore is there now a Zeitgeist plugin (a so called Data Source) available for Diodon. You simply have to install the package diodon-plugins and enable the plugin by going to Preferences -> Plugins.
What this plugin for now basically does is storing a description of what has been copied at a certain time plus the path to the original application content has been copied from. It also points to a clipboard id. However as items currently get deleted when a certain history size has been reached, this id can not be used to execute a copy/paste event again. There are some ideas though for the future that it might be possible to replace the current xml based storage with Zeitgeist completely. This is however only an idea so far. This Diodon Zeitgeist Plugin therefore is a playground to really see what Zeitgeist is capable of and how well it works with a clipboard manager. So if you have any feedback where we can go further from here, please let me know.
Will keep you updated about more exciting news when it comes to Diodon.
Tunefish is no more
Ever heard of Tunefish? If not this post is most likely not for you. However if you have or are interested what it is respectively is not anymore then please keep on reading… ;).
Years ago when I still was at high school we had to write an essay on a Windows related topic. At that time I did not really know much about Linux so I did not mind as much as I would probably do today. I chose to focus on the Windows settings system mainly the Registry. In addition to the essay I also developed an application which is basically an interface to many Windows global settings available. After a while I polished this application a bit and published it as Open Source under the name “Tunefish” on SourceForge. I wrote the application in Delphi which used to be quite popular at that time. I maintained it for a while. However when I completely switched over to Linux quite some time ago I lost interest and gave it up for adoption ;). Unfortunately up to today, there is no-one who wanted to take over this project.
A few days ago when I was crawling through my current projects it occurred to me that not very often, but occasionally people still seem to download Tunefish. However, as it gives you access to many basic Windows settings and has not been tested since Windows XP SP2 it most likely will do more harm then anything else. So I have decided that I delete the project with all its files and executables altogether.
However as there might still be some valuable knowledge in the source code and its thorough documentation the Subversion repository remains for now. So please feel free to have a look at it and use it under the term of the GPLv2 or higher. If someone still wants to take over the hole project please have a look here. That would be awesome. If there is any issue with the current terms the code is licensed under, please talk to me. I am sure we find a solution.
For all former users of Tunefish I just wanted to point out that there are plenty of alternatives out there which do a similar job Tunefish used to do. If you have any other alternatives you use I am sure people would appreciate if you share them as comment on this post.
So Goodbye Tunefish. Let’s head for new shores…